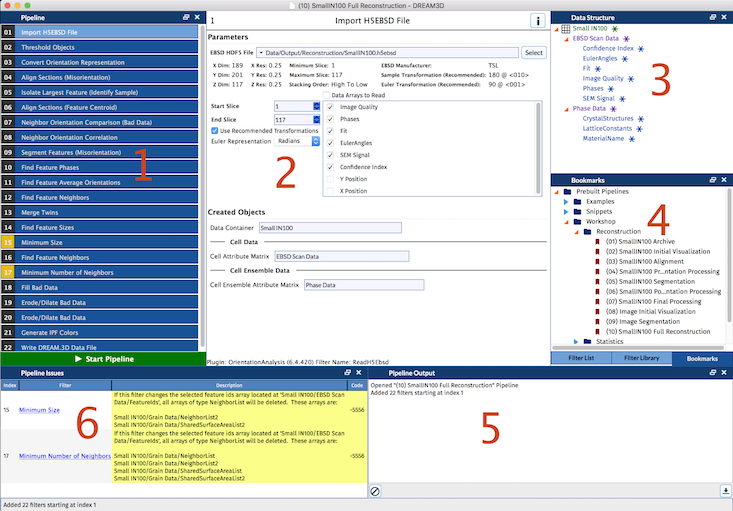
Overview of the User Interface
DREAM.3D has 6 main sections of its user interface:
- Pipeline View
- Filter Input View
- Data Structure
- Filter List, Filter Library, and Bookmarks
- Pipeline Output Log
- Pipeline Issues Table
The Pipeline Error Table can be undocked from the main window and moved around. Additionally, it can also have its visibility toggled by the appropriate button found in DREAM.3D's View menu.
DREAM.3D allows the user to spawn as many main windows as desired. To open a new DREAM.3D instance, click the New... option in the File menu. Each instance of DREAM.3D can act independently, and the user is allowed to run different Pipelines in each main window at the same time.
In order to keep the size of the DREAM.3D exeuctable manageable, most of the libraries it depends on are distributed as loose files. This means that the actual DREAM.3D exeuctable cannot be moved outside of the folder it came in unless all other contents of that folder are moved with it.
The DREAM.3D window is created almost entirely out of dockable widgets, allowing the user to rearrange and nest them as desired. For nested tabs, as shown in Area 4, these widgets can be dragged individually through their named tabs at the bottom. Individual widgets can be dragged through their title bars. The only widget that cannot be moved or part of a group is the Filter Input View.
Pipeline View
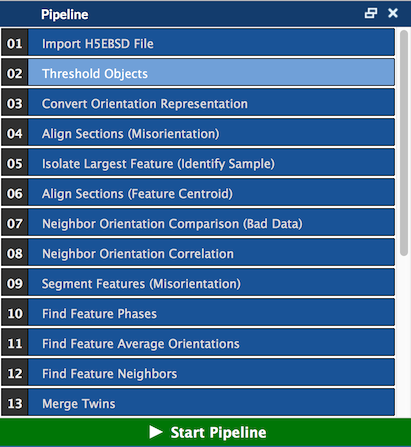
The Pipeline View section displays which Filters are in the current pipeline, and in what order. This section is where the user will construct their Pipeline by double clicking on a Filter in the Filter List or the Filter Library. It is also possible to drag a Filter from these areas and drop it into the Pipeline View. Filters in this section can be rearranged into different orders via dragging and dropping the Filter objects. More information on creating Pipelines can be found in the Creating a Pipeline section.
Preflights & Errors
As the user updates the Pipeline, a process called Preflight will be executed to make sure that the Pipeline will have all the necessary data available during execution. If a Filter object in the Pipeline has an error, it will be colored red. If this is the case, check the Pipeline Error Table for an explanation of the error.
Interacting With Filters & Pipelines
A Filter can be selected by single left clicking. Multiple Filters can be selected by shift-clicking and Ctrl/Cmd clicking. Right clicking on a Filter opens a menu that allows the help for that Filter to be displayed by clicking Filter Help. Filters can be removed from the Pipeline by clicking the red X icon on the Filter object. The entire Pipeline View can be cleared by either choosing Clear Pipeline from the Pipeline menu, or right clicking in an empty area of the Pipeline View to make a contextual menu appear with the Clear Pipeline option. After solving any Preflight errors and creating a satisfactory Pipeline, click the Go button to start running.
Cutting, Copying, and Pasting Filters
Filters can be cut, copied, and pasted by using their right-click menus or the universal keyboard shortcuts (Ctrl+X, Ctrl+C, Ctrl+V). Additionally, Filters can be copied by pressing Alt and dragging them.
Note: Copying Filters puts them onto the system clipboard as a pipeline in JSON format. Therefore, it is possible to create a sub-pipeline of a pipeline currently loaded in DREAM.3D by copying filters to the clipboard in DREAM.3D and then pasting into any text editor.
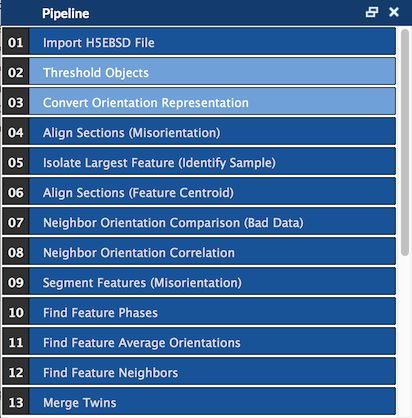
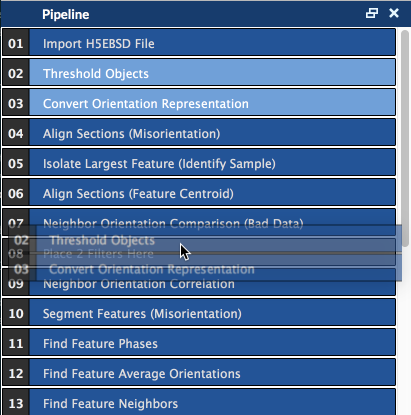
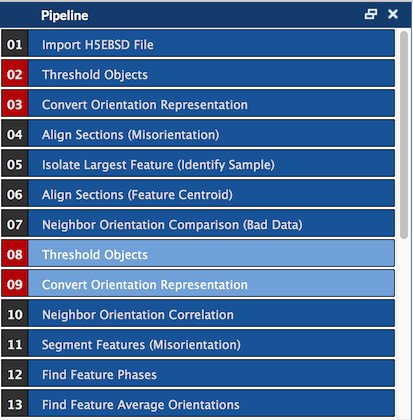
In the example above, filters 2 and 3 are selected and then copied to pipeline index 8 by holding down the Alt key and dragging.
Undo/Redo Filter Placement
It is possible to undo and redo actions such as adding, removing, moving, and clearing Filters using the Undo and Redo items in the Edit menu. Additionally, Undo and Redo can also be invoked by pressing their universal keyboard shortcuts (Ctrl+Z, Ctrl+Shift+Z).
Filter Input View
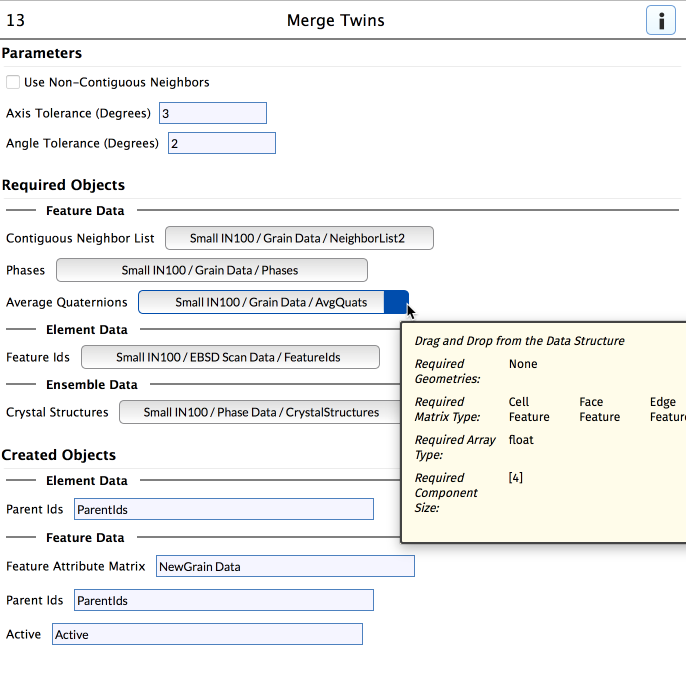
The Filter Input View contains all the parameters for the selected Filter. There are two sections: Variables and Current Structure:
- Variables: Contains Filter Parameters, Required Arrays, and Created Arrays:
- Parameters are generally inputs that influence the functionality of the Filter
- Required Arrays are data structure objects that are needed for the Filter to function
- Created Arrays are data structure objects that the Filter will create during its execution
- Current Structure Displays the state of the data structure as it would look after the selected Filter has executed
Drag and Drop:
With the new Data Container, Attribute Matrix, and Data Array selection, the previous selection buttons have been replaced with a new drag and drop interface with the Data Structure. Mousing over one of these widgets will filter the Data Structure to mark which paths are compatible with the Filter Parameter's requirements. Clicking on this button will hold the filtering until mousing over another selection widget or completing a drag. Drags can be performed from the selection widget to a corresponding path in the Data Structure, from the Data Structure to a selection widget, or between two compatible selection widgets.
Dragging either from a selection widget to the Data Structure or from the Data Structure to a selection widget will assign the value in the Data Structure to the selection widget. Dragging from one selection widget to another will copy the value from the first widget into the second.
Whenever a drag is performed from a selection widget, a custom icon is created with the parameter's name. When dragging from the Data Structure, a custom icon is created with the item's path. In both of these cases, the icon will be colored according to the type of path (Data Container, Attribute Matrix, Data Array).
To help label what type of data is required by a selection widget, each widget is decorated with a colored tab on the right side. This tab corresponds to the color used for filtering the same type of data in the Data Structure.
Viewing A Filter's Help Page
To view the help page for the selected Filter, press the ? icon.
Data Structure
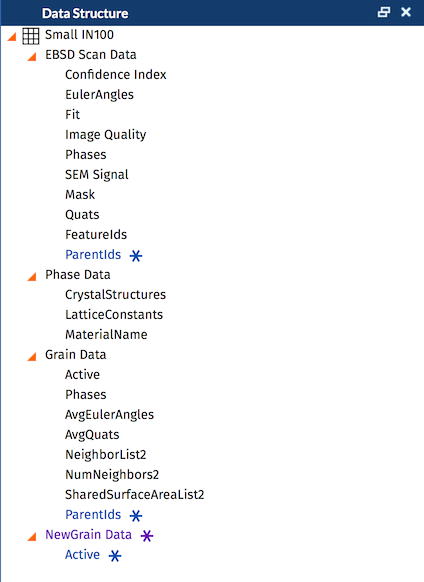
The Data Structure displays the current data structure of the pipeline, including all data containers, attribute matrices, and data arrays that exist in the current pipeline's data container array. This tool is a good way to tell at-a-glance the current structure of your data when clicking on filters in the pipeline.
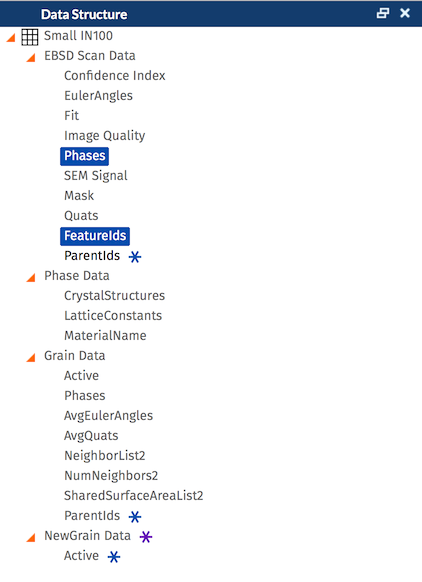
Drag and Drop:
With the new Data Container, Attribute Matrix, and Data Array selection interface, users can now drag paths from the Data Structure and drag them into a corresponding selection widget. When mousing over or dragging an item from the Data Structure, selection widgets in the Filter Input View will be filtered out to clearly display which Filter Parameters can accept the target path.
In addition, because paths created by a Filter cannot also be its inputs, the Data Structure marks which paths are new by changing the item's text color and marking it with a star. These items cannot be dragged and will have an empty outline if they would otherwise be acceptable inputs to a path selection widget.
Filter List
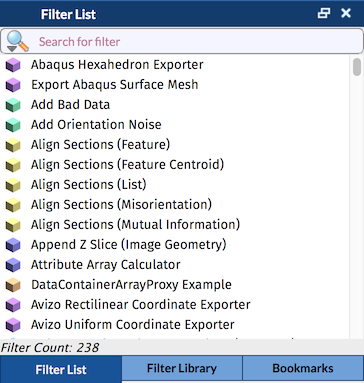
The Filter List section organizes the Filters of DREAM.3D alphabetically by name. Using the search bar, the user can search for Filters based on the display name, group name, subgroup name, branding name, or compiled library name.
Searching Algorithms
Clicking on the magnifying glass icon in the search bar allows the user to pick between three different search algorithms:
- All Words: Search for Filters with names that contain all the words in the search bar, in any order
- Any Words: Search for Filters with names that contain any of the words in the search bar, in any order
- Exact Phrase: Search for Filters with names that match the phrase that is written in the search bar exactly
Filter Library
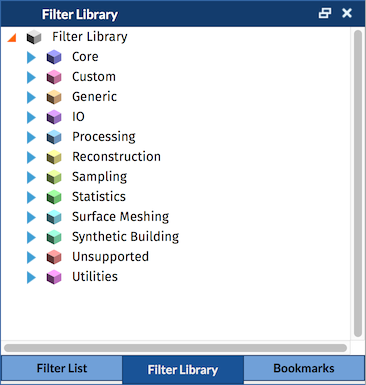
The Filter Library section organizes the Filters of DREAM.3D according to their group and subgroup. The user can expand a specific group (and possibly a subgroup) to expose the Filters. Filters are placed into groups and subgroups based on their functionality. This makes it easy to find Filters based on a desired function. In general, the Filter group will correspond to the Plugin that Filter resides in, but this may not always be the case.
Bookmarks
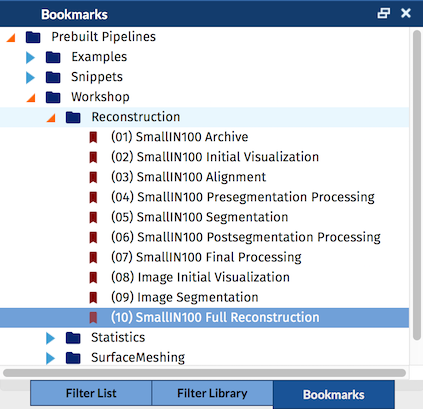
The Bookmarks section is where the user can bookmark any Pipelines that they have saved on the file system for later use. This section allows the user to bookmark the pipelines in any structure that they want, using virtual folders. Visit the Saving & Opening Pipelines section for more information on handling saved Pipelines.
Pipelines and folders containing Pipelines can be dragged from the file system into Bookmarks. The user can right click anywhere in Bookmarks to make a contextual menu appear with additional options.
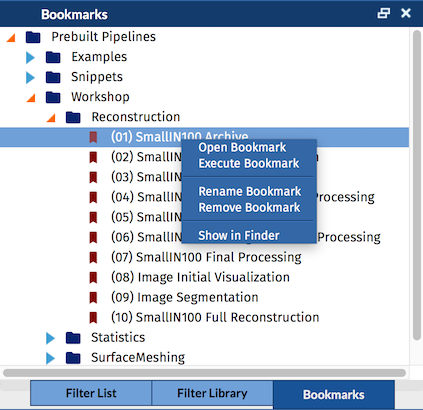
Interacting With Bookmarks
To add a bookmark to Bookmarks, open the Bookmarks menu and choose Add Bookmark. Users can also use the Bookmarks Contextual Menu to add a bookmark by right clicking on an existing virtual folder or empty space and selecting Add Bookmark. Bookmarks and virtual folders can be renamed by right clicking on them and selecting the Rename Bookmark or Rename Folder option. To update a bookmark in Bookmarks, use the Bookmarks Contextual Menu by right clicking on a bookmark and select Update Pipeline. The Bookmark that was right clicked will be updated with the pipeline that is currently in the Pipeline View. To remove a Bookmark or virtual folder from Bookmarks, use the Bookmarks Contextual Menu by right clicking on a bookmark or virtual folder and select Remove Bookmark or Remove Folder. This procedure does not delete the Pipeline files themselves, but only removes them from the Bookmarks View.
WARNING: Removing a virtual folder will also remove all of its contents!
To add a virtual folder to Bookmarks, open the Bookmarks menu and choose New Folder. Users can also use the Bookmarks Contextual Menu by right clicking on a bookmark, virtual folder, or empty space, and selecting New Folder. A specific Bookmark's location on the file system can be viewed by by right clicking on a Bookmark and selecting Show In Finder (Mac OS X) or Show In Windows Explorer (Windows). To open a Bookmark in the Pipeline View, drag and drop it into the Pipeline View. Bookmarks can be dropped into the middle of existing Pipelines if desired. Double clicking on a Bookmark will open the Pipeline in a new main window.
DREAM.3D provides several prebuilt Pipelines that can aid new users in getting started with DREAM.3D. These Pipelines are automatically added to Bookmarks when DREAM.3D is first launched. To open a prebuilt Pipeline in the Pipeline View, drag and drop it into the Pipeline View. Just as with other Bookmarks, prebuilt Pipelines can be dropped into the middle of existing Pipelines. Double clicking on a prebuilt Pipeline will open the Pipeline in a new main window.
Pipeline Output Log
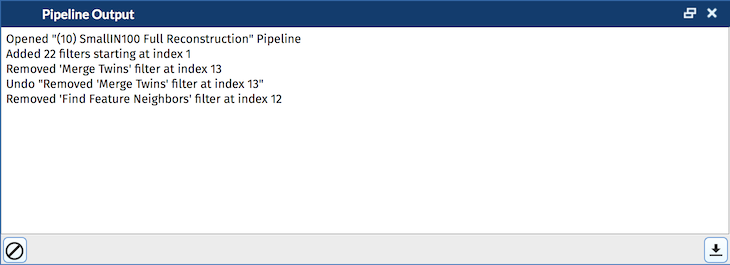
The Pipeline Output Log displays any output messages associated with GUI actions or Filters that are actively being used in the Pipeline View.
Messages are added to the output log when:
- A filter is added, removed, or moved in the Pipeline View.
- An action is undone or redone using the Undo and Redo menu commands.
- A pipeline is opened.
- An executing pipeline needs to display output.
- A message is set in DREAM.3D's status bar.
Pipeline Issues Table

The Pipeline Error Table displays any errors and/or warnings associated with Filters that are actively being used in the Pipeline View.
Preflights and Table Repopulation
This section gets repopulated every time the Pipeline runs its Preflight process, which makes sure that the Pipeline will have all the necessary data available to execute normally. The Preflight process is run any time the user modifies the Pipeline View or Filter Input View sections.